Sunday, September 11, 2011

AMPed up with Soffits

Week 17: The house seemed more quite than usual. Must be that it was mainly just John, our electrician, that was working form sunrise to sunset. I kept asking if he was sleeping there. He was there late into the evening and on Saturday. He has been working feverishly trying to get all the electrical conduit, switch boxes, and power receptacles in so that we can have our rough mechanical inspection on Monday. We also had the framers out to build the soffits and the stair wall. It is starting to take shape inside. If we pass the inspection then it is on to insulation. Next week also has the concrete guys out again to hopefully finish their part. We still need to have the pad poured for the AC outside, the two new piers under the stairwell, the window wells need to be finished, and they are working on the mudroom connection to the old house which had a leak. I also forgot to add a picture the other week of the new water meter. It has a Sensus RadioRead system that allows for radio signals to read the meter electronically. We are also working on finalizing the tiles, starting to get landscaping proposals, and Anne is starting the light fixtures. We bought one form a tent sale at the local hardware store for the mudroom ceiling. We also were out and about and purchased a slightly used espresso coffee system. It probably retailed in the upper $2K new and we got it for $200. Our village was having a sidewalk sale today and the owner was a kitchen designer who is moving to a smaller storefront ans was getting rid of many items that will not fit. We are now looking for a location to install in the new kitchen. Hopefully Mike can work his magic.


Here are the electrical boxes for the kitchen.


Kitchen lights.


More conduit around the existing plumbing.


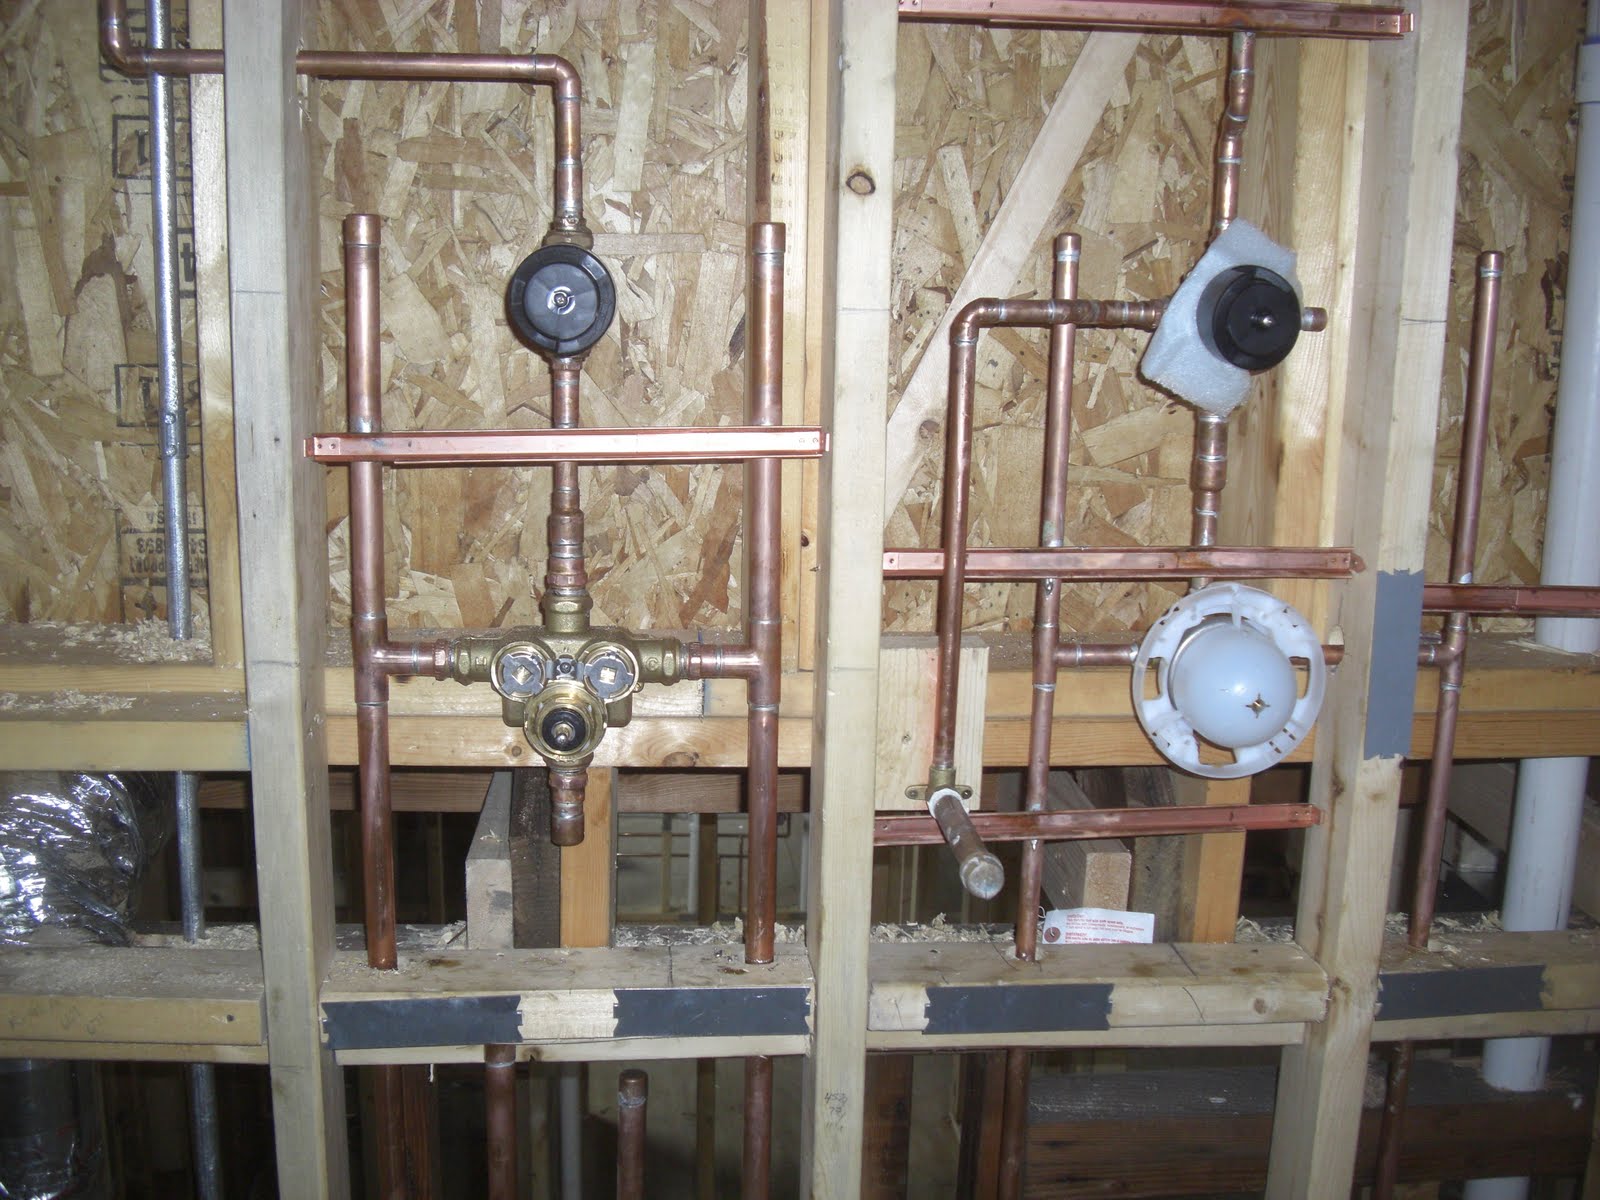
The trifecta-heating, plumbing and electrical in the kitchen


More kitchen conduit and many lines going up to the master suite.


Maze of runs.


The conduit runs up in the master suite.


Here is the new wall for the stairs. We decided to keep the stairs open underneath rather than build the walls and have a few lighted niches. We like that you can see from the kitchen stairs all the way to the wall on the North.


Another view of the wall .


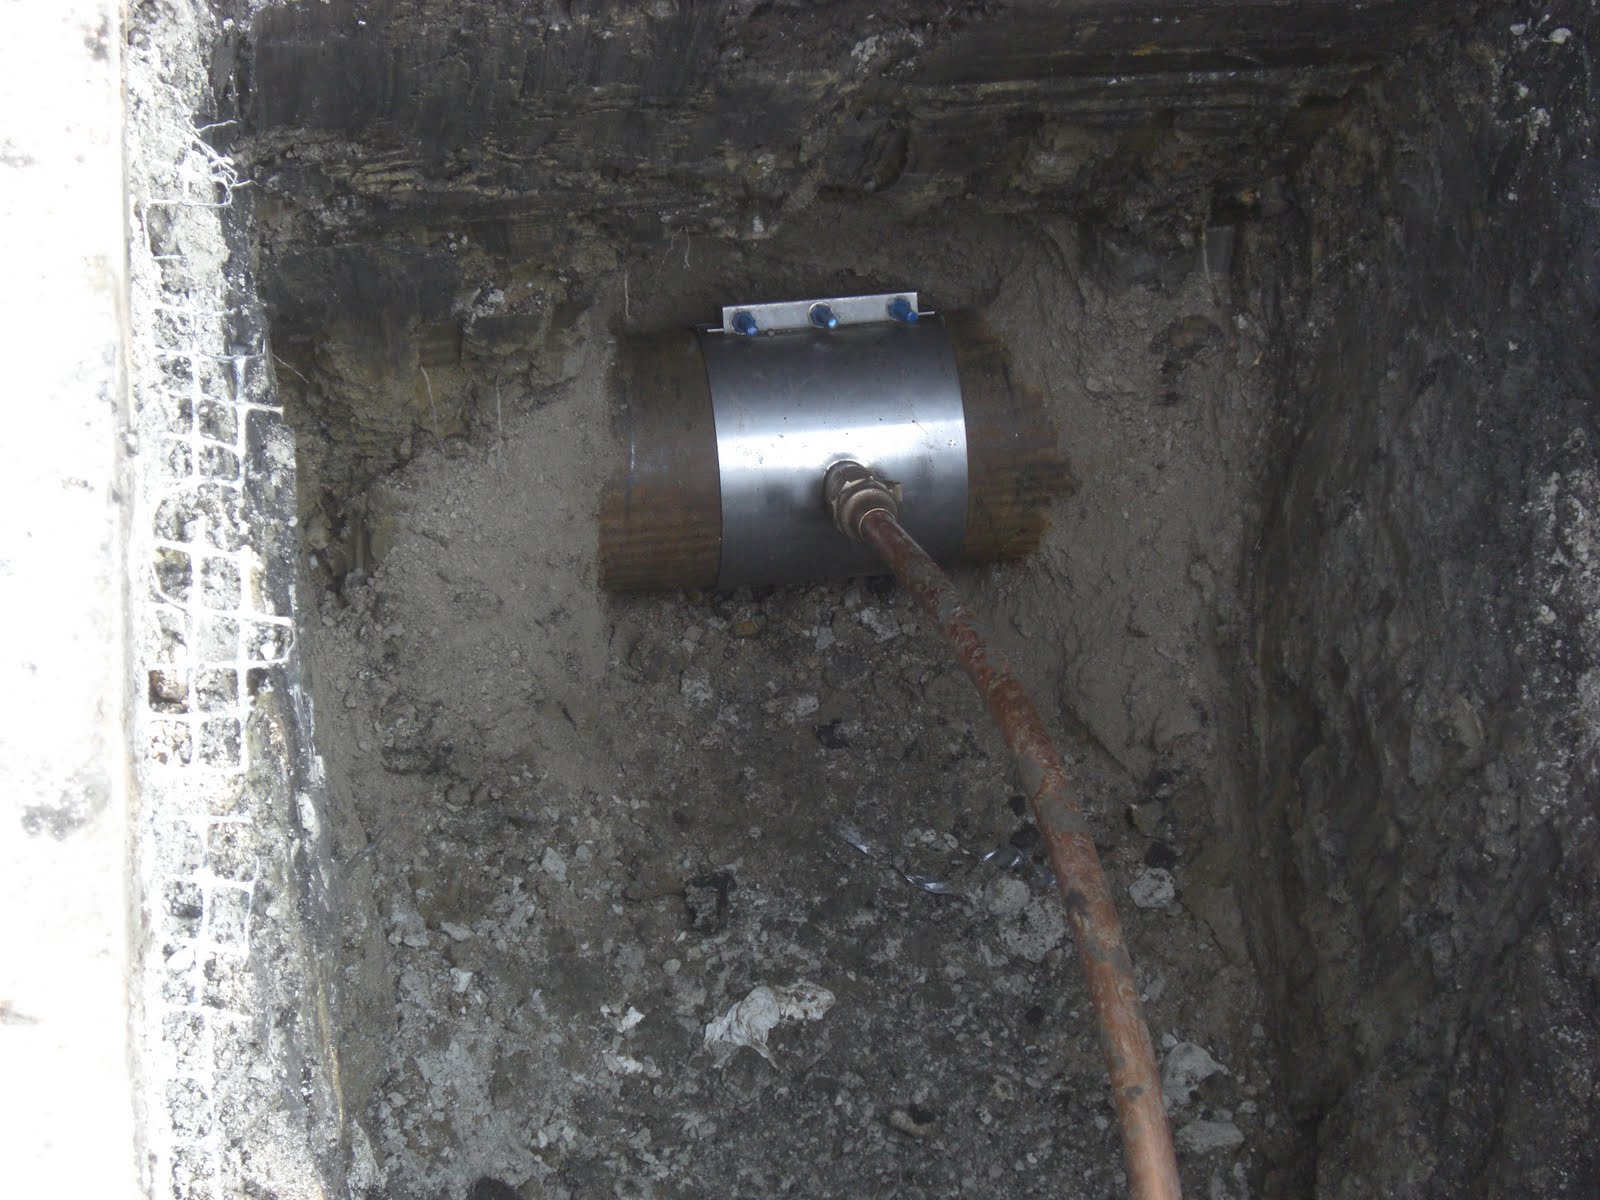
Here is the new water meter with the radio transmitter.


Here is the new design in the foyer. Since the stairs had to be moved due to the structural beam. we had to do something with the slant of the stairs. Ferd designed a cutout that we can either leave open or frame in and will have a down light to highlight. It is bumped out a little from the existing wall.


Also because of the beam location, the main dropped soffit size had to be reduced, but it still will look nice. There will be a LED ribbon light on the inside the circle.


A closer look at the drop soffit.


The soffit extends south a little past a main structural beam and then travels west and goes just past a steel pier and then goes back northward.


Here is what it looks like going past the steel piers


This was done also to hide the water line that is going to the master bathroom. Instead of drilling through the main structural beam, they piped it underneath it. The new soffit will hide that.


Here is the dropped framing for the dinning room light. Ferd has designed it for a nice pendant light. We more than likely will be getting an affordable one now and switch with a more contemporary art one later.


Here is a view underneath the dinning room framing.


This is another round framed soffit that will be over the island.


A closer look. Took a bit of time and effort to build but it is worth it.


Here it is with the 4 recessed light boxes. It took the electrician a lot of time to get all the boxes evenly spaced and centered. Looks more easy than it really was. We really like our electrician. He gives expert advice without being pushy. He makes great suggestions and gives his opinion.


We are also running data and voice cables to several locations with RJ6 (coax cable) for the TV's. We were hoping tho purchase a special bundle that has the wires we want together in one bunch, but of course they have them in older rated cables and the new ones are special order only. So, more labor for our electrician, but he is making his own bundles. He was successful in getting those wires pulled this week as well.

Sunday, September 4, 2011

A-Mazing


Week 16:The rough-ins continued this week. Near the end it was basically just John, our electrician doing his work. The plumbing is done and the HVAC is nearly completed. Looking over the maze of pipes can be overwhelming. There aren't too many paths that the different trades can go, so many have a multitude of pipes by each other. It truly is an art to see how things come together. It is also gratifying to see how the plumbers have protected their pipes with metal plates on the studs, so that we can't inadvertently screw into them. The french doors have also been installed and need fine tuning. We had to do a quick redesign of the kitchen layout due to the main structural beam installation. The original plans did not have it being replaced. Because we had to do so and the location where we had to put it, the stairs had to be moved a bit. In doing that, one of the steel piers was too close to where the island was to be located. So, we met with the architect and they quickly changed a few appliances around and redesigned the island a bit. Once we had that in place, we were able to concentrate on getting all the kitchen and bath cabinets ordered. We are now finalizing the stairs and millwork. Along with that, we are finishing the tiling and flooring selections and will start on the lighting next. Not too many pictures this week, other than pot lights, switch boxes, vents and pipes.


Here are the french doors that will exit to the deck, eventually.


Here are the water lines, drain lines, vent pipes all in a row.


More venting, electrical, heating and drainage pipes.


Here you can see the protective metal plates to protect the pipes from screws.


Electrical lines to the master bedroom.


More drains and pipes.


Drain and water lines.


Here are the rough-ins for the master shower on the right and master tub on the left.


This is the cold water flex pipe for the refrigerator. It is curled in a box to protect it and keep it neat.


Protection for the HVAC supply. This is to protect from the flooring.


Here is the new heating/cooling duct line over the main stairs.


This is the insulated duct line going to the stairs. It is insulated since it will be in the attic space.


Here are the bath van vents going to the exterior of the house.


Here is one supply vent as it heads up to the master bedroom.


Here are some pot lights which had to be rearranged due to all the beam corrections that had to be done.


This is one of the duct lines that we will have to pt a soffit around.


This is the dryer vent.


More pipe protection.


The framing of the stairway to the basement.

Sunday, August 28, 2011

Rough Week

Week 15: This week was more rough-in work with the plumbers and the HVAC subs. Just to make things more interesting, the electrician sub started in the middle of the week also. Great progress on all the rough-in work. We also finally got the permit for the water and sewer installation. Bruce from Wescon came out and spent a few days trenching and laying both 6" PVC pipe for sewage and 1 1/2" copper pipe for the water line. Luckily the street damage was minimal with them boring the water pipe under the road. Of course the first day was met with rain that caused them to delay the installation. By the end of the week, the subs have completed most all their work. after they are done, the concrete guys will be back to pour the front steps, the new footings and piers for the stairwell bump out, the pad for the air conditioner, finalize the window wells, and do the rough grading. After that, I think we will be starting insulation and maybe the siding.

Here is the PVC pipe for the new sewage hookup. The old one was clay that was cracked due to the large maple trees roots.


Here they are topping off the pipe with crushed stone before back filling.


Here they are back filling with topsoil.


Here is the trench for the new water service. We had to tap into a new service junction and then cap the old connection.


Here is Bruce uncoiling and laying the new copper water line in the trench.


Here the line meets the street. They then had to bore underneath the street.


Before boring under the street, they had to add a shut off valve.


Here is what the tap into the water line looks like. We also had to get a larger meter due to the larger pipe.


Here they are digging another hole into my neighbor's yard. This was to cap the old tap we had into the water line. Happily, this is the last time we should have to dig up his yard.


Here is all that is left of the hole for the new tap in. It will be topped off shortly with asphalt.


Here is one of the large return ducts that goes across the old attic space. The return duct is completely insulated as well.


Duct lines running up to the master bedroom.


Here are the main trunk lines that will tie into the furnace.


The duct line here is going into the master bathroom. Since it is going under the balcony outside, it has to be insulated.


Here is the main return next to the basement steps. You can also see the gas line that is going to the fireplace.


This is a back view in the basement of the duct lines and where the furnace will connect up.


The puzzle of duct lines.


Duct lines and water lines in the basement.


More ducts.


Ducts to the master bathroom mixed with electrical box.


The electrician started this week. Yeah, electrical boxes.


Her are the pot lights and fan box in the upstairs family room.


This is the row of pot lights in the master bath.


The master bedroom pot lights and fan box.


These are for three wall sconces in the stairwell.


Here are the pot lights that will be on the balcony.


Here are the outlets for the bathroom, which include the power outlets, the switch for the fan/lights, and one for the thermostat for the radiant floor heating.


More switch boxes. It is interesting to see how the piping is laid out.


Lose up of one of the Juno pot light housing. The top of the box is insulated and fire rated so that it will not burn the insulation in the attic thus causing a fire.


Along with the interior piping, the plumbers added to spigots outside.


Here is what a bathtub drain hookup looks like from the underside.


Here is the main stack line that is connected to the new sewer pipe outside the house.


This is an ejector pump for sewage. This pump is for the fixtures to drain to and if it floods and the sewage starts coming back into the house, the check valve will shut off and no sewage should then flood the house.


Here is another shot of the ejector pump and the main stack line.


This is the water main line hookup with the main shutoff valve that will then be hooked up to the water meter.


This water line to the upstairs toilet caused a lot of discussion. The first idea was to drill through the main structural beam. Instead we decided to go under it since there will already be a soffit that is being built around it and will ultimately hide the pipe.


Close up of the water pipe.


Here are many drains that all converge with the water lines around it. The water lines are going to the laundry room and the drains are form the upstairs bathroom and laundry room.


This is the master bathroom shower rough in. The water lines and valves are all connected.


Here are the master bathroom faucet rough ins. They will be mounted to the wall rather than the vanity top.


This is a insulated vent pipe for the bathroom fan. All the vents will have these running to the outside of the house


Here is one of the Panasonic bath fans we have. These fans are one of the best out there. They are so quite that you think they are not running.


Here is a shot of the bathroom fan hooked up to the vent.


These are the vents outside.


This is where the master bath fan vents will be located.


More vents surround a pot light over the bathtub. This is GFCI rated for use in wet locations.